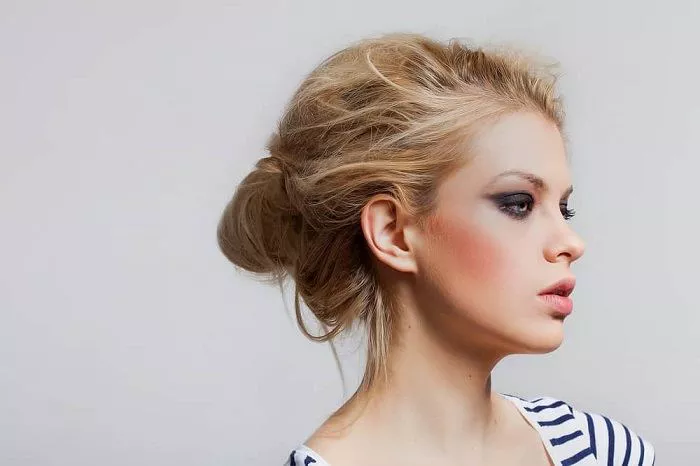
Having thin and short hair doesn’t mean you have to miss out on the fun and stylish messy bun look. In fact, with the right approach, you can create an alluring messy bun that adds a touch of charm and sophistication to your appearance. This article will guide you through the process step by step, allowing you to master this trendy hairstyle even with your short and fine locks.
Preparing Your Hair
Wash and Condition Wisely
Start with freshly washed hair. Use a volumizing shampoo and conditioner to give your thin hair a bit of a boost. When rinsing out the conditioner, focus on the ends to avoid weighing down the roots. After washing, gently towel – dry your hair.Don’t rub vigorously as it can cause breakage.
Add Some Grip
To make your hair more manageable and to help the bun hold, apply a small amount of texturizing product. A dry shampoo works wonders here. Sprinkle it at the roots and massage it in. This will not only absorb any excess oil but also add texture.Another option is a light – hold hairspray. Spray it evenly over your hair, especially near the roots and mid – lengths.
Sectioning Your Hair
The Crown Section
Part your hair as you usually would. Then, using your fingers, separate a section of hair from the crown of your head. This section will be the starting point of your bun. It doesn’t have to be a large section, especially since your hair is short. A section about 1 – 2 inches wide at the front and tapering towards the back is usually sufficient.
The Remaining Hair
Leave the rest of the hair down for now. You’ll incorporate it into the bun later. Make sure the hair is smooth and tangle – free. If you have any flyaways or baby hairs, you can use a small amount of hair gel to smooth them down.
Creating the Base of the Bun
Twist the Crown Section
Take the crown section of hair and start twisting it. Twist it tightly at first. As you twist, the hair will naturally start to coil up. Keep twisting until you can’t twist anymore. If your hair is very short, you may need to hold the ends together as you twist to prevent them from slipping out.
Form the Initial Bun
Once you’ve twisted the hair, start coiling it around the base where you separated the section. Tuck the ends of the twisted hair under the coil. Use a bobby pin or two to secure the coil in place. Make sure the pins are inserted at an angle to hold the hair firmly.
Incorporating the Remaining Hair
Sides First
Take a small section of hair from one side of your head. Gently pull it towards the bun. Twist it slightly and then wrap it around the base of the bun. Secure it with a bobby pin. Do the same on the other side. You can repeat this process a few times, adding more hair from the sides to make the bun look fuller.
Back Hair
For the hair at the back, you can either gather it all together and twist it before wrapping it around the bun or take small sections at a time. When you take small sections, it gives a more tousled and messy look. Wrap each section around the bun and secure with bobby pins. Make sure to distribute the hair evenly around the bun.
Adding the Messy Effect
Loosen the Bun
Use your fingers to carefully pull at the bun. Gently tug on some of the coils to make them looser. This will give the bun a more relaxed and messy appearance. You can also pull out a few strands of hair around your face and the nape of your neck to frame your face.
Fluff the Bun
Lightly fluff the bun by pushing it up from the bottom. This will add more volume. Be careful not to overdo it as you don’t want to completely disrupt the structure of the bun. You can also use the end of a comb to gently tease the hair inside the bun for added volume.
Finishing Touches
Secure with Hairspray
To make sure your messy bun stays in place, give it a light spray of hairspray. Hold the can about 6 – 8 inches away from your head and spray evenly. This will help hold the shape of the bun and keep any loose strands in place.
Check for Symmetry
Take a quick look in the mirror to make sure the bun looks balanced. If one side seems fuller than the other, you can adjust by adding or removing a small amount of hair from that side.
Conclusion
With these simple yet effective steps, you can create a beautiful messy bun with your thin short hair. It may take a bit of practice at first, but soon you’ll be able to whip up this stylish hairstyle in no time. Whether you’re going for a casual day out or a more formal event, the messy bun is a versatile look that will enhance your overall appearance and make you feel confident and chic. So, don’t be afraid to experiment and have fun with your hair!

