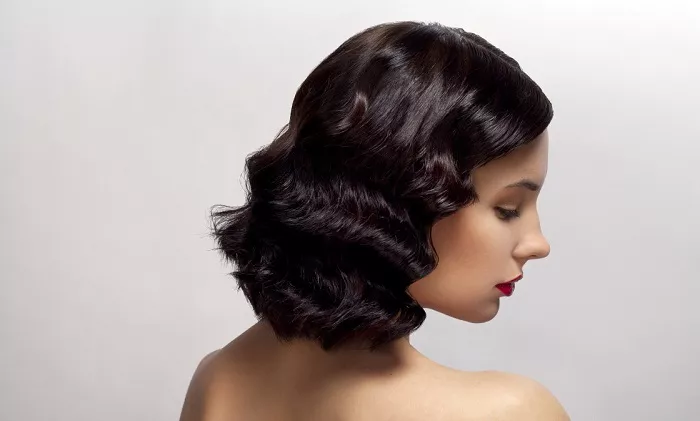
The 1920s was an era of glamour and unique fashion, and the hairstyles of that time are still iconic today. For those with long hair, achieving a 1920s look can be a fun and stylish way to transform your appearance. This article will guide you through the steps to create a beautiful 1920s hairstyle.
Preparing Your Hair
Washing and Conditioning
Start by washing your long hair with a gentle shampoo. This will remove any dirt, oil, or product build – up. Rinse thoroughly. Then, apply a conditioner, focusing on the ends of your hair. The conditioner will make your hair more manageable and prevent it from getting tangled during the styling process. After applying the conditioner, leave it on for a few minutes as per the product instructions and then rinse it out completely with cool water. Cool water helps to close the hair cuticles, making your hair look shinier.
If your hair is very thick or coarse, you may want to consider using a deep – conditioning treatment a day or two before styling. This can further soften and smooth your hair, making it easier to work with.
Drying Your Hair
Gently towel – dry your hair to remove excess water. Avoid rubbing your hair vigorously with the towel as this can cause frizz.
Instead, pat it dry or squeeze it gently. You can then let your hair air – dry partially or use a blow – dryer on a low – heat setting. If you use a blow – dryer, keep it at least 6 inches away from your hair and move it constantly to prevent over – heating. You can also use a diffuser attachment if your hair is curly or wavy to help maintain its natural texture while drying.
Creating the Base
Parting Your Hair
Decide on the parting for your 1920s hairstyle. A deep side part is a classic choice for this era. You can use the end of a comb to create a sharp, defined part starting from the middle of your forehead and going towards the side of your head. This will give your hairstyle an elegant and asymmetrical look. If you prefer a more centered look, a middle part can also work, but the side part is more characteristic of the 1920s style.
Once you’ve made the part, use a fine – toothed comb to smooth down the hair on either side of the part. This will create a clean and polished look.
Making a Low Ponytail
Gather all of your hair at the nape of your neck, just above the hairline. Use a hair tie to secure it in a low ponytail. Make sure the ponytail is tight and smooth. You can use a small amount of hair gel or pomade to tame any flyaways and keep the hair in place. This low ponytail will serve as the base for the rest of the hairstyle.
Styling the Hair
Creating the Finger Wave
To create the signature finger waves of the 1920s, start with the hair at the front of your head near the part. Apply a small amount of styling gel or mousse to this section of hair. Using your fingers, create an “S” – shaped wave by pressing the hair against your scalp.
Hold the wave in place for a few seconds to set it. You can use bobby pins to secure the wave if needed.
Continue creating these finger waves along the front of your hair, working your way towards the ponytail. The waves should be close together and have a uniform look. You can use a comb to help smooth and shape the waves as you go. If you make a mistake, simply wet the hair slightly with a spray bottle and start again.
For the sides of your hair, you can create smaller waves that curve towards the back of your head. This will add to the overall 1920s look and give your hairstyle more dimension.
Twisting and Pinning the Ponytail
Once you have created the finger waves at the front, it’s time to style the ponytail. Divide the ponytail into two sections.
Twist each section tightly in the same direction. Then, wrap the twisted sections around each other to form a bun – like shape. Tuck the ends of the hair under the bun and use bobby pins to secure it in place. Make sure the bun is neat and flat against the nape of your neck.
You can also add some decorative hairpins or a small hair accessory, such as a jeweled clip or a feather, to the bun to enhance the 1920s look. This will add a touch of glamour to your hairstyle.
Finishing Touches
Hairspray
To ensure your 1920s hairstyle lasts throughout the day or evening, use a strong – hold hairspray. Hold the hairspray can about 8 – 10 inches away from your head and spray evenly over your entire hairstyle. This will set the finger waves and keep the bun in place.
Be careful not to over – spray as this can make your hair look stiff and unnatural.
Adding a Headband or Fascinator
For an extra 1920s touch, consider adding a headband or a fascinator. A beaded or jeweled headband can be placed across the front of your hair, just above the finger waves. It will add a touch of elegance and sparkle. If you choose a fascinator, it can be attached to the side of your head with bobby pins. Fascinators were very popular in the 1920s and can really complete the look.
Conclusion
By following these steps, you can create a stunning 1920s hairstyle for your long hair. Whether you’re going to a themed party or just want to try a new and glamorous look, this hairstyle is sure to turn heads. With a little practice, you’ll be able to master the art of 1920s hair styling.

