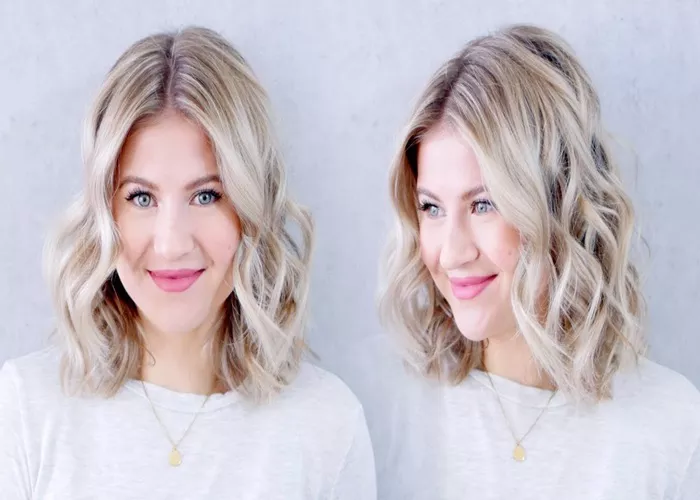
Creating small curls with a flat iron can transform your look and add a touch of elegance to any hairstyle. While it might seem challenging, with the right technique and tools, you can achieve beautiful, defined curls that last all day. In this article, we will guide you through the step-by-step process of curling your hair with a flat iron, including preparation, curling techniques, and tips for maintaining your curls.
Preparing Your Hair
1. Clean and Dry Hair:
Start with clean, dry hair. Wash your hair with a volumizing shampoo and conditioner to add body and texture. Dry your hair thoroughly using a blow dryer, as damp hair can be damaged by the heat of the flat iron.
2. Apply Heat Protectant:
Before using any heat styling tools, it’s crucial to apply a heat protectant spray or serum. This product creates a barrier between your hair and the heat, preventing damage and keeping your hair healthy.
3. Section Your Hair:
Divide your hair into manageable sections. Use clips to separate the top layers from the bottom layers. Working in sections ensures that you curl every strand and achieve a uniform look.
Choosing the Right Flat Iron
1. Select a Suitable Flat Iron:
For small curls, choose a flat iron with narrow plates, ideally 1 inch or less in width. Ceramic or tourmaline plates are preferable as they distribute heat evenly and reduce frizz.
2. Adjust the Temperature:
Set the flat iron to the appropriate temperature for your hair type. Fine or damaged hair requires a lower temperature (around 300-350°F), while thick or coarse hair can handle higher temperatures (350-400°F).
Creating Small Curls
1. Start with the Bottom Section:
Begin with the bottom section of your hair. Take a small strand, about 1 inch wide, and clamp the flat iron near the roots. Hold the iron vertically for tighter curls.
2. Twist and Glide:
Twist the flat iron away from your face while gently gliding it down the hair strand. The key is to twist the iron continuously as you move it, creating a spiral curl.
3. Release and Repeat:
Release the curl and let it cool naturally. Repeat the process with the remaining strands in the bottom section. Once finished, move to the top sections, repeating the same steps.
SEE ALSO: How to Use the Toni & Guy Curling Wand?
4. Alternate Curl Directions:
To achieve a more natural look, alternate the direction of the curls. Curl some strands away from your face and others towards your face. This variation adds dimension and prevents the curls from clumping together.
Finishing Touches
1. Allow Curls to Cool:
Once all sections are curled, allow your hair to cool completely. Cooling helps set the curls and ensures they last longer.
2. Loosen the Curls:
Gently run your fingers through the curls to loosen them. For a softer look, use a wide-tooth comb or a paddle brush. Avoid brushing too much, as this can lead to frizz and loss of definition.
3. Apply Hairspray:
To hold the curls in place, apply a light mist of hairspray. Choose a flexible hold hairspray to maintain movement and bounce. Hold the can about 12 inches away from your head to avoid applying too much product.
Maintaining Your Curls
1. Avoid Touching Your Hair:
Minimize touching your hair throughout the day. The oils from your hands can weigh down the curls and cause them to lose shape.
2. Use a Silk Pillowcase:
Sleeping on a silk pillowcase reduces friction and helps maintain your curls overnight. Silk pillowcases also prevent frizz and breakage.
3. Refreshing Curls:
If your curls start to lose their shape, refresh them with a curling iron or the flat iron. Lightly spritz your hair with water or a curl refresher spray, and re-curl the sections that need a touch-up.
Common Mistakes to Avoid
1. Using Too Much Heat:
Excessive heat can damage your hair and cause it to become dry and brittle. Always use the lowest effective temperature for your hair type and use a heat protectant.
2. Curling Large Sections:
Curling large sections of hair can result in uneven curls that don’t hold well. Stick to small, 1-inch sections for the best results.
3. Skipping the Cooling Process:
Allowing your curls to cool is crucial for longevity. Don’t skip this step, as it helps set the curls and prevents them from falling flat.
Additional Tips and Tricks
1. Experiment with Techniques:
Different techniques can produce various curl patterns. Experiment with twisting the flat iron at different angles or changing the direction of the twist to find the style you like best.
2. Use a Lightweight Serum:
If you have frizzy hair, apply a lightweight serum after curling to smooth out any flyaways and add shine. Avoid heavy products that can weigh down your curls.
3. Try Different Partings:
Changing your parting can give your curls a fresh look. Try a deep side part or a zigzag part to add interest and volume.
4. Protect Your Hair:
Regular use of heat styling tools can damage your hair over time. Give your hair breaks between styling sessions and use deep conditioning treatments to keep it healthy.
Conclusion
Curling your hair with a flat iron is a versatile technique that allows you to create beautiful, small curls with ease. By following the steps outlined in this article, you can achieve salon-quality curls at home. Remember to prepare your hair properly, use the right tools, and take care of your curls to keep them looking fabulous all day long. With practice, you’ll become a pro at creating small curls that enhance your natural beauty and elevate your hairstyle.
You May Be Interested In

