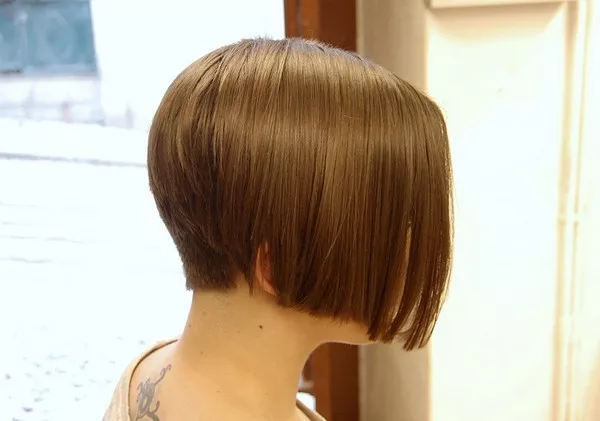
The side part bob hairstyle has become a timeless classic, offering a versatile and sophisticated look that suits a variety of face shapes and hair textures. Whether you’re a professional hairstylist or experimenting with DIY haircuts at home, knowing how to cut a side part bob can elevate your styling skills to the next level. In this comprehensive guide, we’ll walk you through the step-by-step process of achieving the perfect side part bob haircut.
1. Prepare Your Tools
Before you begin cutting, it’s essential to gather all the necessary tools to ensure a smooth and precise haircut. You’ll need a sharp pair of haircutting scissors, a fine-tooth comb, sectioning clips, a spray bottle filled with water, and a handheld mirror to check your progress throughout the cutting process.
2. Start with Clean, Dry Hair
For best results, start by washing and thoroughly drying the hair before cutting. Clean hair will allow you to see the natural texture and movement, making it easier to achieve an even and balanced haircut. Once the hair is dry, comb through to detangle and remove any knots or tangles.
3. Section the Hair
Using your fine-tooth comb, create a clean parting on the side where you want the part to be located. Section off the hair on the opposite side of the part and secure it with a clip to keep it out of the way while you work. This will help you maintain control and precision as you cut the side part bob.
4. Determine the Length
Decide on the desired length of the side part bob, keeping in mind factors such as face shape, hair texture, and personal style preferences. For a classic look, aim for a length that falls just below the jawline, framing the face beautifully. Use the handheld mirror to check the length from different angles and make any necessary adjustments.
5. Create the Guide Section
Starting at the back of the head, take a horizontal section of hair near the nape and comb it straight down. This will serve as your guide section for cutting the length of the bob. Use your fingers to hold the hair firmly in place and cut straight across using the haircutting scissors. Repeat this process, working your way up towards the crown, ensuring each section is cut to the desired length.
6. Establish the Side Part
Once you’ve established the length of the bob, it’s time to create the side part. Using the fine-tooth comb, comb the hair on the parted side towards the face, following the natural curvature of the head. Use the comb to refine the parting until it’s clean and precise, then use the handheld mirror to check the symmetry and balance of the part from both sides.
7. Layer and Texture
To add dimension and movement to the side part bob, consider incorporating layers and texture into the haircut. Starting at the front sections of the hair, take vertical sections and point-cut into the ends using the scissors to create soft, blended layers. This will help remove excess weight and bulk from the hair, resulting in a more dynamic and flattering hairstyle.
8. Refine and Perfect
Once the haircut is complete, take a few moments to assess the overall shape and balance of the side part bob. Use the handheld mirror to check for any uneven sections or stray hairs that may need further trimming. Make any final adjustments as needed to ensure a polished and professional finish.
Conclusion
In conclusion, cutting a side part bob requires careful planning, precision, and attention to detail. By following the step-by-step guide outlined above, you can achieve a beautifully balanced and stylish haircut that complements your unique features and personal style. Whether you’re a seasoned hairstylist or a DIY enthusiast, mastering the art of cutting a side part bob will allow you to create stunning looks that stand the test of time. So grab your scissors and get ready to unleash your creativity – the perfect side part bob awaits!

