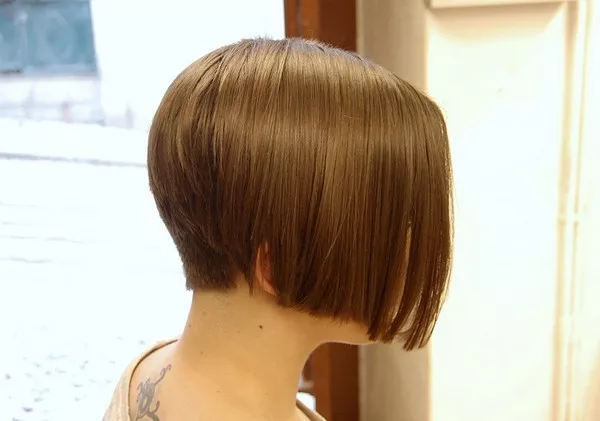
In recent times, the trend of cutting one’s own hair at home has gained momentum, with the bob haircut being a popular choice for those seeking a chic and timeless look. While it might seem daunting to attempt a DIY bob haircut, with the right guidance and tools, you can achieve professional results in the comfort of your home. This article will provide you with a comprehensive guide on how to cut your own bob haircut, ensuring a stylish outcome without stepping foot into a salon.
1. Gather the Essential Tools
Before embarking on your DIY bob haircut journey, make sure you have the necessary tools in place. This includes a pair of high-quality hair cutting scissors, a fine-tooth comb, hair clips, and a handheld mirror. Having the right tools ensures precision and minimizes the risk of uneven cuts.
2. Start with Clean and Dry Hair
Begin the process by washing and thoroughly drying your hair. Cutting clean, dry hair allows for more accurate measurements and helps you visualize the final result. If you have curly hair, consider straightening it before cutting to achieve a more even and precise bob.
3. Section Your Hair
Divide your hair into manageable sections to make the cutting process more organized. Use hair clips to secure the upper layers, focusing on one section at a time. This step ensures that each layer is cut consistently, contributing to a polished end result.
4. Determine the Length
Decide on the desired length for your bob haircut. It’s recommended to start with a longer length initially, as you can always trim more if needed. Remember that bobs can vary in length, from a classic chin-length bob to a more daring short bob, so choose a length that complements your face shape and personal style.
5. Create the Guideline
Establish a guideline for the length by sectioning off a small portion of hair at the back. This will serve as a reference point for the rest of the haircut. Ensure the guideline is straight and accurately represents the chosen length for your bob.
6. Begin Cutting
Start cutting along the guideline, holding the hair at a slight angle to achieve a soft and natural finish. Use small, precise cuts rather than large ones, as this allows for better control and prevents over-cutting. Continue this process, gradually moving towards the front sections of your hair.
7. Check for Evenness
Regularly check for evenness by comparing each side of your bob. Use the handheld mirror to view the back of your head, ensuring a balanced and symmetrical cut. Make any necessary adjustments to achieve a uniform length.
8. Create the Graduation
For a classic bob look, create a subtle graduation by angling the scissors slightly while cutting the hair at the nape of the neck. This technique adds dimension and movement to the bob, enhancing its overall appearance.
9. Refine and Texture
Once you have achieved the basic shape, refine the cut by texturizing the ends. This involves making small, vertical cuts into the ends of the hair to create a soft and textured finish. Be cautious not to over-texturize, as it can result in an uneven appearance.
10. Style and Finishing Touches
After completing the cut, style your bob as desired. Experiment with different styling techniques, such as straightening, curling, or adding waves, to enhance the overall look of your DIY bob. Apply a small amount of styling product to add shine and hold.
Conclusion: Mastering the DIY Bob Haircut
Cutting your own bob at home may initially seem intimidating, but with the right tools and a systematic approach, achieving professional results is entirely possible. Follow these step-by-step guidelines, take your time, and embrace the process of creating a stylish and personalized bob haircut in the comfort of your own space. With practice, you’ll gain confidence in your DIY haircutting skills, empowering you to maintain your bob hairstyle with ease.

