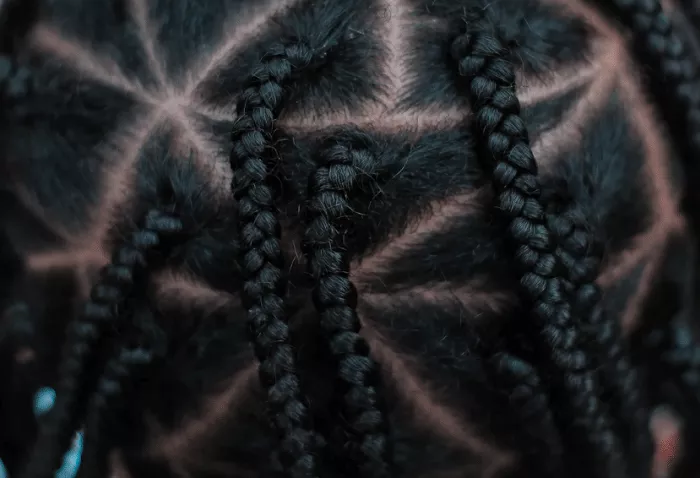
Knotless braids have become a popular and stylish choice for many people. While they are often associated with longer hair, it is also possible to create beautiful knotless braids on short hair. This process requires some specific techniques and considerations. In this article, we will guide you through the steps of creating knotless braids on short hair.
Preparation
Gather the Right Tools
You will need a few essential tools. A rat – tail comb is crucial for parting the hair neatly. A wide – toothed comb can be used to detangle the hair before starting. You also need some hair extensions if you want to add length or thickness. Make sure the extensions match your hair color as closely as possible. Additionally, you’ll need some hair clips to separate the hair sections during the braiding process.
Prepare the Hair
Before starting the braiding, wash and condition your hair. This ensures that your hair is clean and manageable. Dry your hair thoroughly as wet hair can be more difficult to work with. If your hair is very short, you may want to consider using a light leave – in conditioner to add some moisture and make the hair more pliable.
Sectioning the Hair
Part the Hair
Use the rat – tail comb to create a clean part down the center of your head or wherever you prefer the braids to start. This initial part will determine the direction and placement of your knotless braids. For example, if you want a more symmetrical look, a center part is a good option. If you prefer an off – center or side – part look, adjust the part accordingly.
Divide into Smaller Sections
Once you have the main part, start dividing the hair into smaller sections. The size of the sections will depend on how thick you want your braids to be. For short hair, it’s often better to make the sections relatively small. Clip the sections you are not working on to keep them out of the way. Each section should be about an inch wide or less, depending on the overall volume of your hair.
Starting the Knotless Braid
Attach the Extension
Take a small piece of hair extension and place it under the section of your natural hair at the root. You can use a small amount of hair glue or a specialized braiding gel to hold the extension in place at the root. Make sure the attachment is secure but not too tight to avoid discomfort. The extension should blend seamlessly with your natural hair.
Begin the Braiding Process
Start braiding the natural hair and the extension together. Use a three – strand braiding technique. Take the left strand and cross it over the middle strand, then take the right strand and cross it over the new middle strand. As you braid, gradually add more of the extension hair to the strands. This will create the illusion of a seamless, knotless braid. Make sure the tension is even throughout the braid to keep it looking neat.
Maintaining the Braid
Keep the Tension Consistent
While braiding, it’s important to maintain a consistent tension. If the tension is too loose, the braid may look sloppy and unravel easily. If it’s too tight, it can cause discomfort and even damage to your hair. As you move down the length of the braid, check regularly to ensure that the tension remains the same. You can adjust your grip on the hair strands if needed.
Incorporate More Extension Hair
As you progress with the braid, continue to incorporate more of the extension hair. This will give the braid more length and thickness. Make sure to distribute the extension hair evenly among the strands. You can do this by gently pulling the extension hair from the sides and adding it to the appropriate strands as you braid.
Finishing the Braid
Secure the End
When you reach the end of the desired length of the braid, you need to secure it. You can use a small elastic band that matches your hair color. Wrap the elastic band tightly around the end of the braid to hold it in place. Make sure the end of the braid is smooth and there are no loose strands sticking out.
Trim the Ends if Necessary
If the ends of the braid look uneven or there are any frayed pieces, you can carefully trim them with a pair of sharp scissors. Be cautious not to cut the braid too short or accidentally cut your natural hair within the braid.
Styling and Caring for the Knotless Braids
Styling Options
Once you have completed the knotless braids on your short hair, there are various styling options. You can pull the braids back into a small ponytail or a bun for a more elegant look. You can also leave them loose and add some decorative hair clips or beads to the ends of the braids for a more stylish appearance.
Caring for the Braids
To keep your knotless braids looking good, avoid getting them wet frequently as this can cause the hair to frizz and the braids to loosen. When you wash your hair, be gentle and use a mild shampoo. You can also use a satin scarf or pillowcase at night to reduce friction and prevent the braids from getting damaged.
Conclusion
In conclusion, creating knotless braids on short hair requires attention to detail and practice. By following these steps, you can achieve beautiful and stylish knotless braids that enhance your short hair and give you a unique look. With proper care, these braids can last for several weeks, allowing you to enjoy your new hairstyle.

