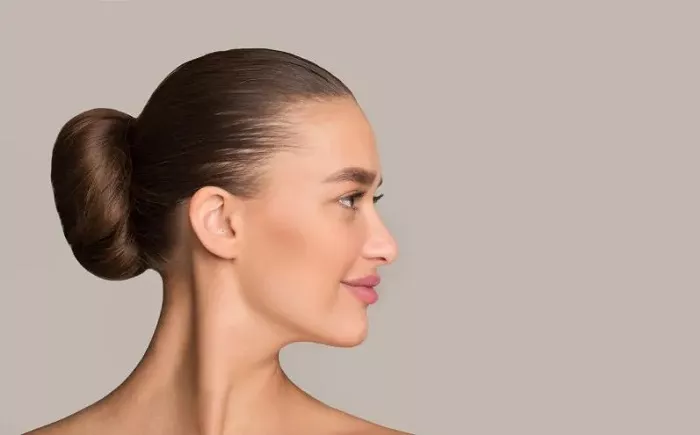
The donut bun is a stylish and versatile hairstyle that can add a touch of elegance and charm to any look. While it’s commonly associated with longer hair, it’s entirely possible to create a beautiful donut bun with short hair too. Here’s a step-by-step guide on how to achieve this look.
Prepare Your Hair
Start with Clean Hair
Begin by washing your hair with a suitable shampoo and conditioner. This will ensure that your hair is clean and manageable. If your hair is naturally straight, you can skip this step, but if it’s curly or wavy, it’s a good idea to straighten it slightly for easier styling. You can use a flat iron to smooth out any kinks or waves, but be careful not to overdo it as you still want some texture in the hair for a more natural look.
Add Texture
To give your short hair some grip and texture, apply a texturizing spray or a light-hold mousse. This will help the hair hold the shape of the bun better and prevent it from looking too slick or flat. Spray the product evenly throughout the hair and then use your fingers to tousle it gently.
Gather Your Tools
Donut Bun Maker
You’ll need a donut bun maker. These come in different sizes, so choose one that is appropriate for the length and volume of your hair. If your hair is very short, a smaller donut may be more suitable. You can find donut bun makers in various materials such as foam or fabric.
Hairpins
Have a good supply of bobby pins or hairpins on hand. These will be used to secure the bun in place. Opt for pins that match the color of your hair for a more seamless look.
Elastic Band
An elastic band will be used to create a ponytail base for the bun. Choose an elastic that is not too tight to avoid pulling on your hair or causing discomfort.
Creating the Ponytail
Section Your Hair
Divide your hair into two sections – the top and the bottom. The top section should be larger and cover the area from the crown of your head to about an inch or two above your ears. The bottom section will be the remaining hair at the nape of your neck.
Tie the Bottom Section
Take the bottom section of your hair and tie it into a low ponytail using the elastic band. Make sure the ponytail is secure but not too tight. You can leave a small tail of hair out of the elastic if you want to create a more textured look later.
Add Volume to the Top Section
Backcomb the top section of your hair gently to create volume. This will give the bun more fullness and make it look more prominent. Be careful not to overdo the backcombing as it can make your hair look messy. Once you’ve achieved the desired volume, smooth the top of the hair with a comb.
Combine the Sections
Take the top section of your hair and place it over the ponytail of the bottom section. Combine the two sections by wrapping the top hair around the elastic band, covering it completely. You now have a single ponytail with more volume and height.
Wrapping the Donut
Insert the Donut
Take the donut bun maker and slide it over the ponytail. Position it so that the center of the donut is at the base of the ponytail, close to your scalp.
Wrap the Hair Around the Donut
Start wrapping the hair around the donut, starting from the ends and working your way up. Tuck the ends of the hair under the donut and use bobby pins to secure them in place. Keep wrapping and pinning until all the hair is wrapped around the donut and the bun is starting to take shape. Make sure to cover the donut completely for a more polished look.
Adjust and Secure
Once you’ve wrapped all the hair, use your fingers to gently pull and adjust the bun to make it look more even and full. You can also pull out a few strands of hair around your face for a softer, more flattering look. Then, use more bobby pins to secure any loose ends or areas that need extra support. Insert the pins at an angle to ensure they hold firmly.
Finishing Touches
Style the Front
If you have bangs or shorter strands at the front, you can style them as desired. You can sweep them to the side, pin them back, or leave them loose to frame your face. Use a small amount of hairspray to keep them in place if needed.
Add Accessories
To add some extra charm to your donut bun, consider adding a hair accessory. A simple hairpin with a decorative element, a flower, or a small ribbon can make a big difference. Place the accessory at the side or on top of the bun for a stylish touch.
Set the Bun
Finally, apply a light-hold hairspray all over the bun to set it in place and ensure it lasts throughout the day. This will also help to control any flyaways and give your hairstyle a more polished finish.
Conclusion
In conclusion, creating a donut bun with short hair is not as difficult as it may seem. With a little preparation, the right tools, and some patience, you can achieve a stylish and trendy look that is sure to turn heads. Whether you’re going for a casual day out or a more formal occasion, the short hair donut bun is a versatile option that can add a touch of elegance and sophistication to your overall appearance. Experiment with different textures, accessories, and styling techniques to make the look your own and have fun with this fashionable hairstyle.

