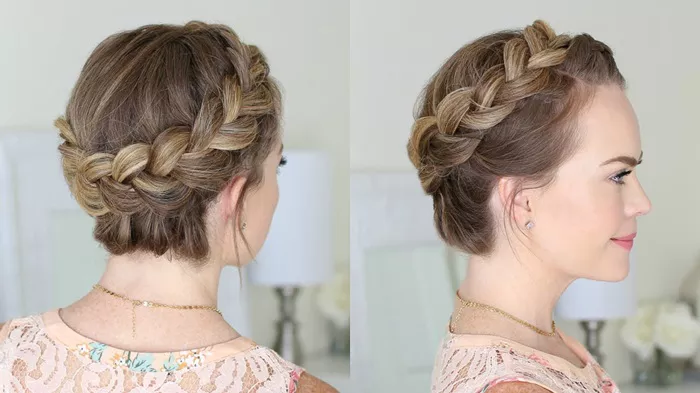
Dutch braids, also known as inverted or inside-out braids, have become a popular choice for individuals with short hair seeking an elegant and practical hairstyle. Unlike traditional braids where sections are crossed over each other, Dutch braids involve crossing sections under, resulting in a chic look that adds texture and dimension to shorter locks. If you’ve been yearning to master this trendy hairstyle on your own, look no further. In this guide, we’ll walk you through every step, ensuring you achieve flawless Dutch braids each time, even with short hair.
Introduction to Dutch Braids:
Dutch braids are a versatile hairstyle that works exceptionally well for short hair. They involve weaving sections of hair under one another to create a raised, 3D effect that is both stylish and practical. Dutch braids are perfect for those with shorter locks as they help keep hair out of the face while adding a touch of sophistication to any look.
Tools and Products Needed:
Before diving into the braiding process, gather the following tools and products:
1. Wide-tooth comb for detangling
2.Hair ties or elastic bands
3.Bobby pins to secure the braids
4.Texturizing spray or hairspray for added hold (optional)
Having these essentials on hand will ensure a smooth and hassle-free braiding experience.
Hair Preparation:
Start by washing your hair with a suitable shampoo and conditioner, then towel dry gently. Brush through your hair to remove any knots or tangles, ensuring it is smooth and manageable before braiding.
Sectioning the Hair:
Section your hair into two equal parts, dividing it down the middle from the forehead to the nape of the neck. If you have shorter layers, use the end of a comb to create clean, precise parts that will make braiding easier.
Braiding Technique:
Now, let’s dive into the braiding process:
1.Begin with a small section of hair near your forehead.
2.Divide this section into three equal parts.
3.Cross the right strand under the middle strand, then the left strand under the middle strand.
4.As you continue braiding, add small sections of hair from the sides into each strand before crossing it under the middle strand.
5.Repeat this process, working your way down the length of your hair.
6.Secure the end of the braid with a hair tie or elastic band.
Remember to keep the braids tight and close to the scalp for a sleek finish.
Managing Short Layers:
If you have shorter layers, incorporate them into the braids by gently guiding them into each section as you braid. Use bobby pins to secure any loose ends or flyaways, ensuring a polished look.
Finishing Touches:
To add volume and dimension to your Dutch braids, gently tug on the sides of each braid, pulling them slightly apart to create a fuller appearance. You can also pancake the braids by gently pulling on the loops to make them appear thicker and more textured.
Troubleshooting Common Issues:
If you encounter slipping braids or uneven sections, don’t panic. Simply backtrack to the problem area and readjust the tension, ensuring each section is braided securely. You can also use extra bobby pins to anchor any loose sections in place.
Maintenance and Care:
To maintain your Dutch braids, sleep with a silk or satin scarf to prevent frizz and preserve the style overnight. You can also touch up any loose sections or flyaways with a bit of hairspray or texturizing spray for added hold.
With these expert tips and techniques, you’ll be well on your way to mastering Dutch braids on short hair like a pro. So grab your tools, follow the steps, and prepare to turn heads with your stunning new look. Happy braiding!
Related topics:

